

EasyTrack allows you to customize and manage courier mappings for your Shopify store, syncing them directly with PayPal and Stripe. This feature lets you rename couriers from your Shopify store to match the names required by your payment platforms, ensuring smooth integration and syncing.
Accessing Courier Mapping
- In your Shopify admin, go to Apps and open EasyTrack.
- Navigate to Settings and select Courier Mapping.
In the Courier Mapping interface, you can add, update, delete, and search for specific courier mappings. Here’s how to manage each of these features:

Adding a New Courier Mapping
To create a custom mapping between your Shopify store’s courier and the name synced to PayPal and Stripe:
- Click Add Mapping.
- A form modal will appear, allowing you to enter:
- Store Courier Name: The courier name as it appears in your Shopify store.
- Mapped Courier Name: The custom name you want synced to PayPal and Stripe.
- Once you’ve entered the names, click Save to create the mapping.

Note: Adding a mapped courier name helps ensure compatibility with your payment platforms.
Updating an Existing Courier Mapping
To modify an existing mapping:
- In the list of mappings, find the mapping you want to update and click Edit.
- The form modal will open with the current mapping values pre-filled.
- Edit the Mapped Courier Name as needed and click Save to update the mapping.
![]()
Deleting a Courier Mapping
If you need to remove a mapping:
- Locate the mapping you want to delete.
- Click the Delete icon (trash bin) next to the mapping.
- A confirmation modal will appear. Click Confirm to permanently delete the mapping.
![]()
Warning: Deleting a mapping will remove it from syncing with PayPal and Stripe. Be sure to confirm this action.
Searching for Courier Mappings
To quickly find a specific courier mapping:
- Use the Search bar at the top of the Courier Mapping page.
- Type in the courier name (either Store Courier or Mapped Courier).
- EasyTrack will filter the list to show only the relevant mappings.
![]()
Best Practices for Courier Mapping
- Use Consistent Naming: Make sure the mapped courier names match the exact format required by PayPal and Stripe to avoid syncing issues.
- Regularly Update Mappings: If your courier names change in Shopify, update them in EasyTrack to keep your mappings accurate.
Easily update order tracking information in bulk using EasyTrack’s “Import Tracking CSV” feature. This tool lets you import a CSV file containing orders and tracking details, automatically syncing the data to PayPal and Stripe in the background.
Steps to Use “Import Tracking CSV”:
1. Click “Import CSV”: Open the import feature by clicking the “Import CSV” button.
![]()
2. Download the Template: Download the CSV template to ensure your data is correctly formatted.

3. Upload Your CSV File: Upload your completed CSV file with order and tracking information.

4. Automatic Sync: EasyTrack updates your order tracking and syncs the info to PayPal and Stripe in the background.
5. Refresh to View Results: Use the Refresh button to see the latest sync status and results.
This streamlined process helps you keep tracking information up-to-date across platforms, saving you time and effort.
The Shipment Tracking feature in EasyTrack keeps your tracking information updated in real time, giving you and your customers complete visibility into the shipping status of each order.
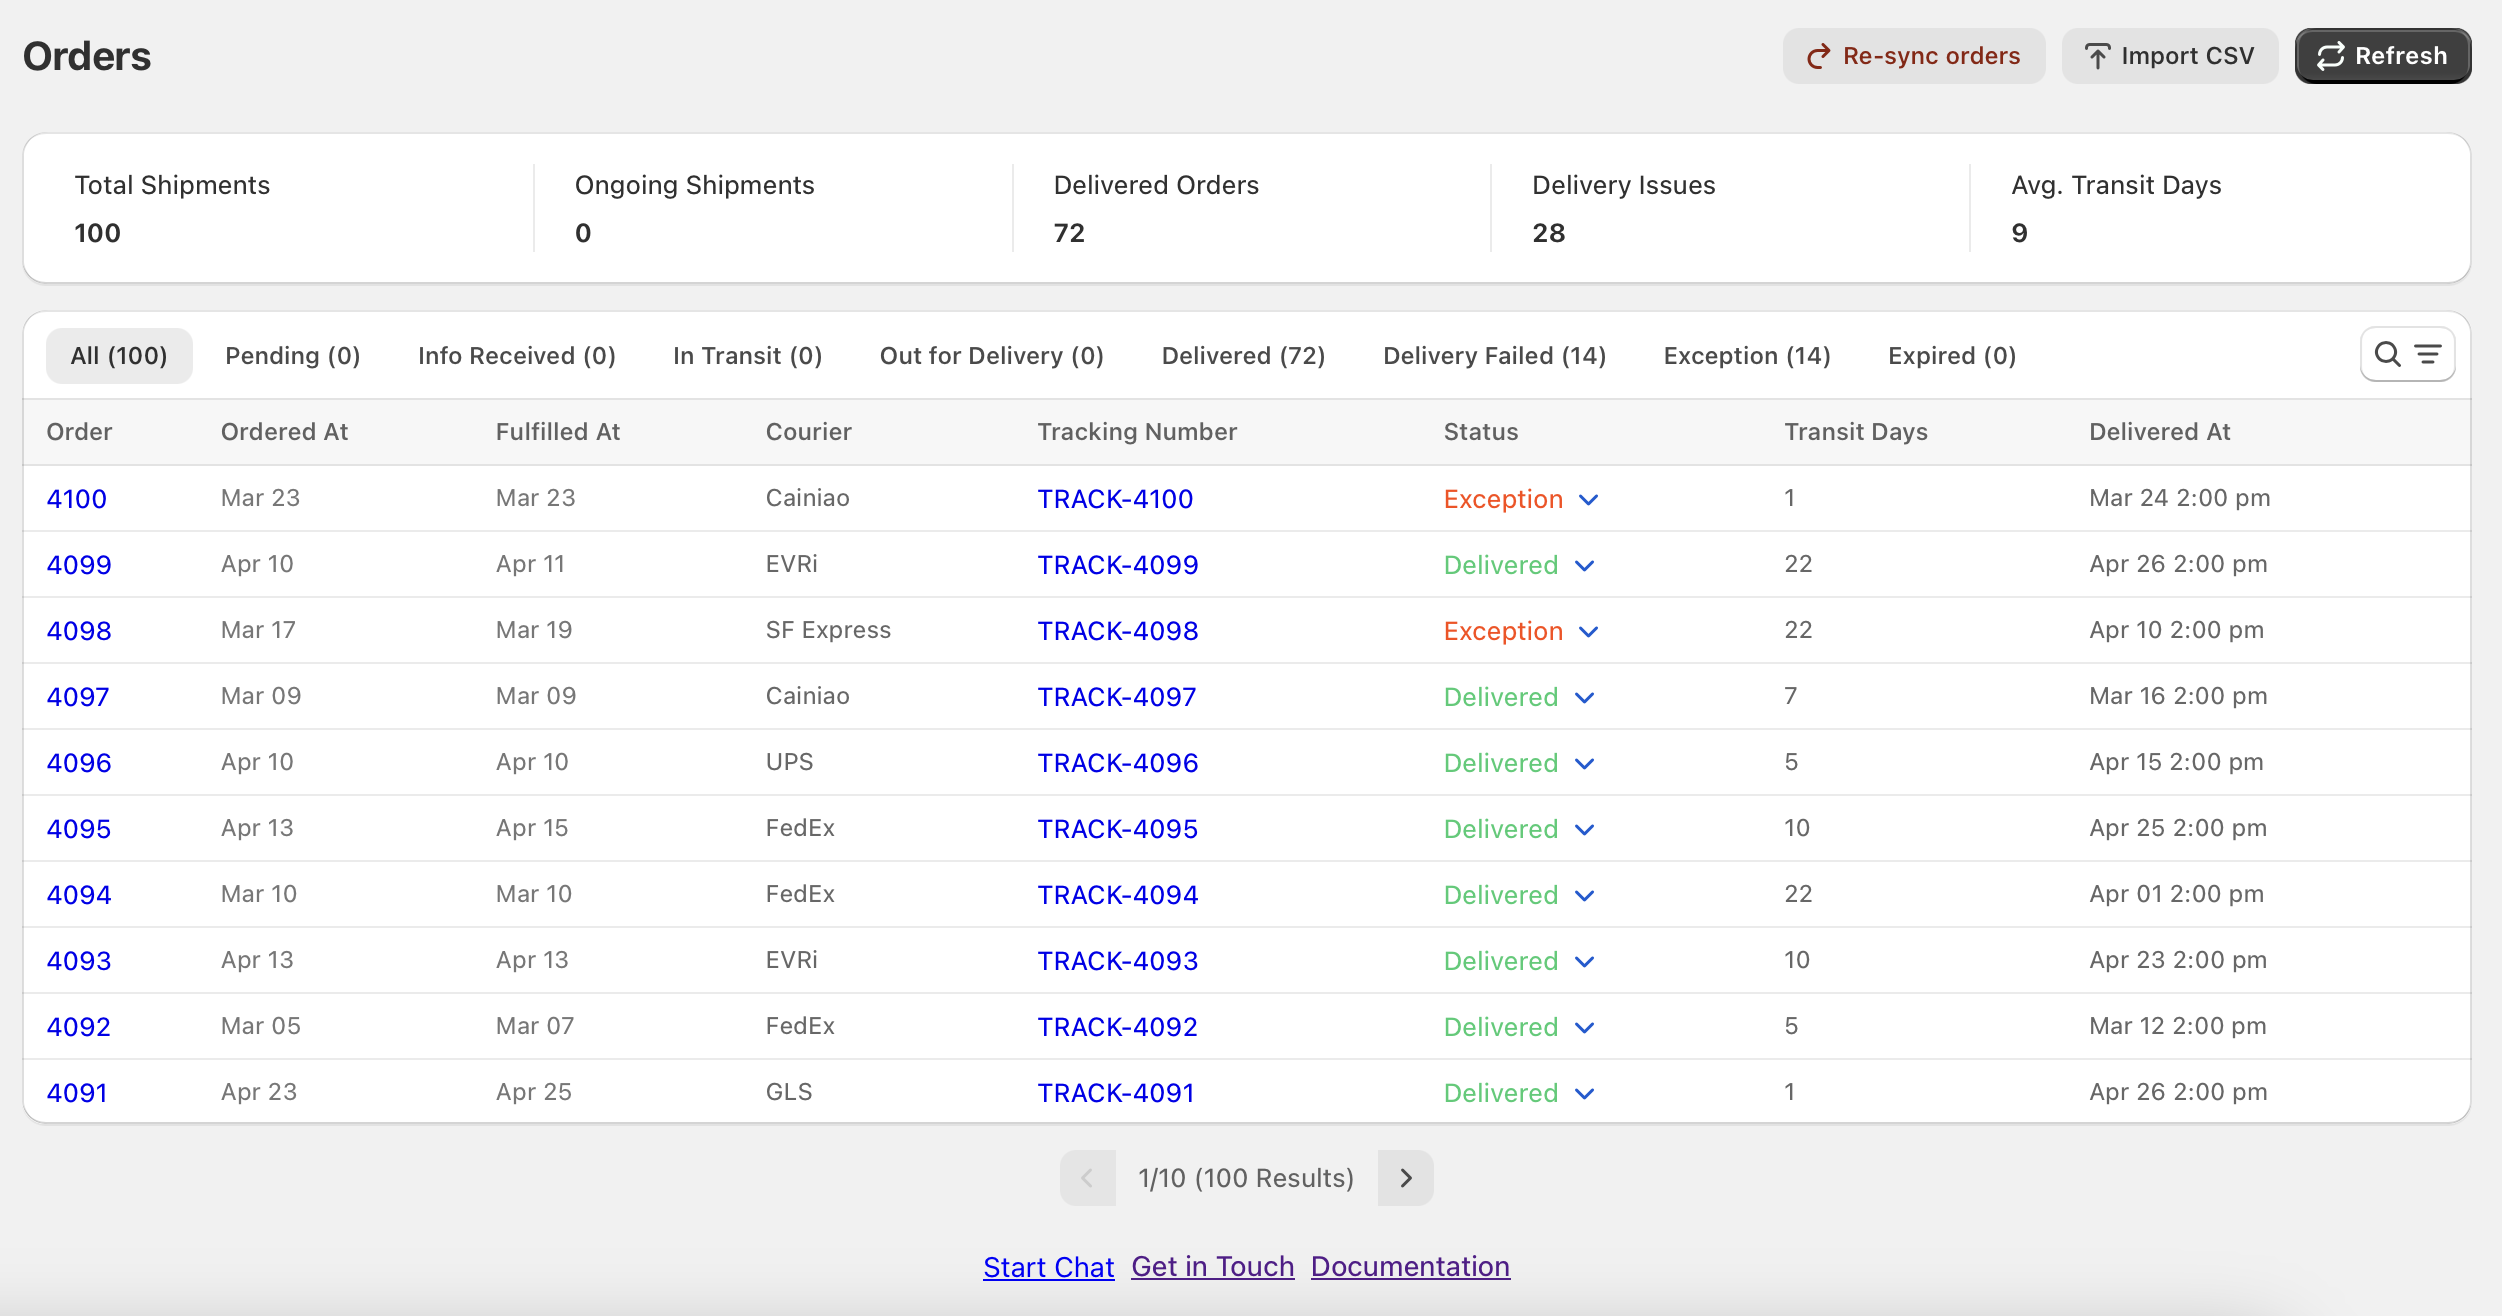
How Shipment Tracking Works
Real-Time Updates: When tracking information is added to a fulfilled order, EasyTrack monitors and updates the shipment status step-by-step. Each update is reflected in real time, ensuring tracking details are always current.
Dedicated Tracking Status Column: In the Orders table, a dedicated column displays the Tracking Status for each order item. This status updates as the shipment progresses, helping you quickly identify where each order is in the delivery process.
Detailed Tracking Info: For each order, EasyTrack provides:
- Last Updated: The timestamp of the most recent tracking update.
- Tracking Link: A clickable link to view detailed tracking progress directly from the courier.
- Delivered Days: Displays the total number of days from fulfillment to delivery, providing insight into delivery times.
With Shipment Tracking, EasyTrack delivers clear, detailed tracking updates, helping merchants monitor order journeys and giving customers a better post-purchase experience.
The Invoice Generation feature in EasyTrack enables you to quickly create and download invoices for your orders in PDF format. This feature simplifies the process of generating professional invoices for record-keeping or customer requests.

How Invoice Generation Works
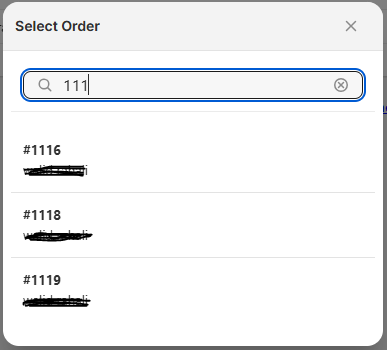
Generate an Invoice:
- Click on the Generate Invoice button.
- A popup window will open, allowing you to search for a specific order.
- Select the desired order, and EasyTrack will generate the invoice automatically.
Download the Invoice:
- Once the invoice is generated, simply click the Download icon to save the invoice as a PDF.
- The downloaded PDF can be used for customer communication, internal records, or financial documentation.
With Invoice Generation, EasyTrack provides a quick and efficient way to create and retrieve order invoices, helping you keep organized and meet customer or business needs.
The Analytics feature in EasyTrack provides valuable insights into your order and tracking synchronization across PayPal and Stripe. With a clear overview of your order statuses and sync performance, you can monitor and optimize your processes to maintain smooth operations and prevent issues.
📊 Key Components of Analytics
Shipment Performance Overview
Get a quick snapshot of your order tracking performance with summary cards showing:
Total Shipments: The total number of fulfilled orders with tracking numbers.
Delivered Rate: Percentage of orders successfully delivered.
On-Time Delivery Rate: Percentage of orders delivered within the expected delivery window.
Delivery Delay Rate: Percentage of orders delivered later than expected.
Delivery Issue Rate: Percentage of orders marked as failed or exceptions.
Average Transit Time: The average number of days it took for delivered orders.
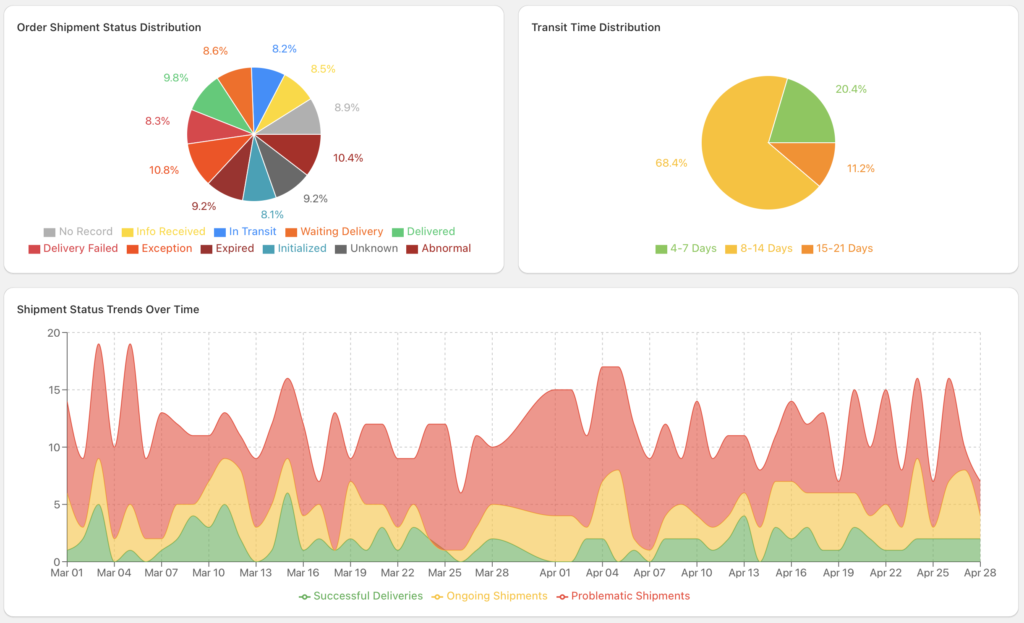
📦 Order Shipment Status Distribution
A pie chart visually breaks down current shipment statuses, including:
Delivered
Delivery Failed
Exception
This helps you identify the ratio of successful vs. problematic shipments at a glance.
⏱ Transit Time Distribution
Another pie chart categorizes delivered shipments by how long they took to arrive:
0–1 Days
2–3 Days
4–7 Days
8–14 Days
15–21 Days
22+ Days
Use this to evaluate carrier performance and optimize shipping strategies.
📈 Shipment Status Trends Over Time
A timeline chart shows trends in daily shipment statuses:
✅ Successful Deliveries
🚚 Ongoing Shipments
⚠️ Problematic Shipments
This highlights spikes in delivery failures or delays and helps track improvements over time.
With Order Tracking Analytics, EasyTrack gives you a clear view of how well your shipping process performs — helping you reduce delivery issues, improve customer experience, and stay proactive with fulfillment performance.